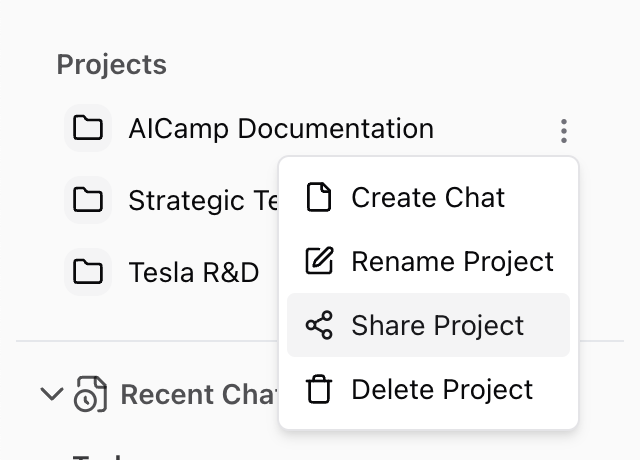
How to Share a Project
- Open the project you want to share
- Click the three-dot menu (⋮) in the top-right corner
- Select “Share Project”
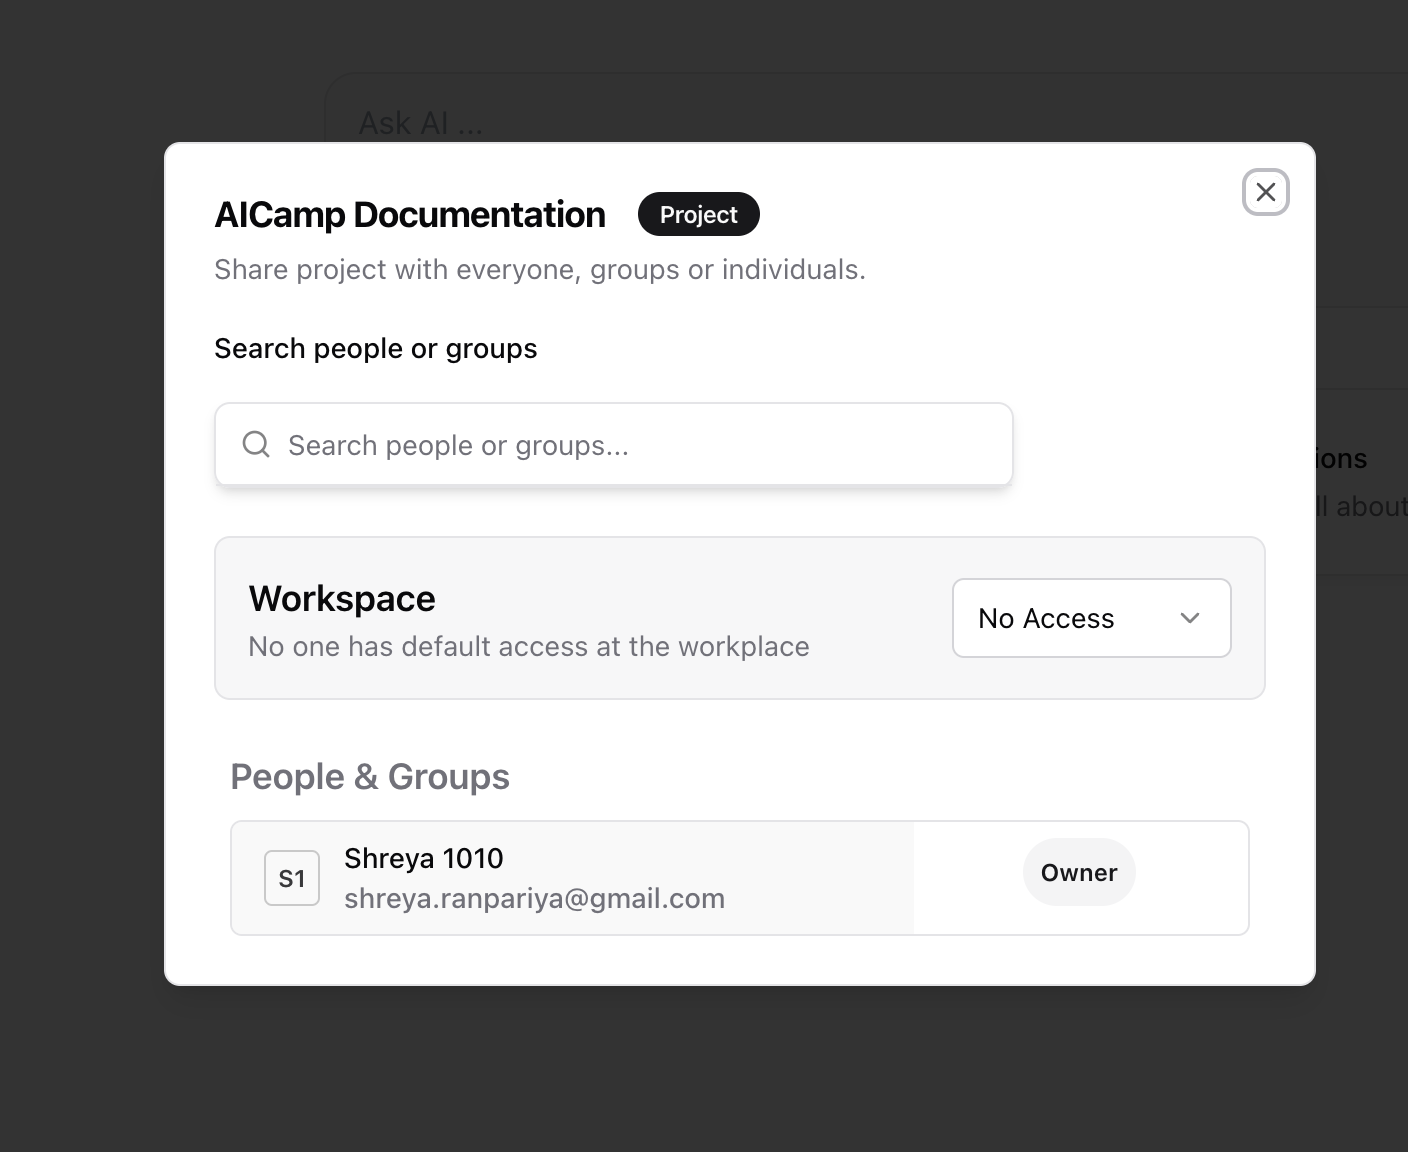
- In the popup, choose how you want to share:
Share with Individuals or Groups
- Use the search bar to find teammates or groups
- Set access to:
- Can View – Can access the project, view chats, and use files
- Can Edit – Can add files, update instructions, and create new chats
Make the Project Workspace-Wide
To make a project visible to everyone in your organization:- In the share popup, find the Workspace Access section
- Choose:
- No Access – Only you (and those explicitly added) can see it
- Can View – Everyone in the workspace can open and use the project
- Can Edit – Everyone can make changes (use with caution)
Workspace-shared projects are discoverable by all users and appear in the shared project list.
What Happens When You Share a Project
- All chats, files, and project instructions are visible to people you share it with
- New chats or files added later are automatically included
- Project context is preserved, so everyone works from the same base
Best Practices for Sharing Projects
- Use group sharing for department-specific workflows
- Make key projects workspace-visible for central processes like onboarding, policy review, or content standards
- Limit “Can Edit” to trusted team members to avoid accidental changes